

Yesterday you could read our post about the first renovation of the houseboat - what we did while the boat was still in the water. Today is the continuation. Here's what happened when we lifted the boat onto land and started to work on the real challenges.
 Tweet
Tweet Share
Share Share
Share Pin
Pin Share
Share Share
ShareInnehållsförteckning
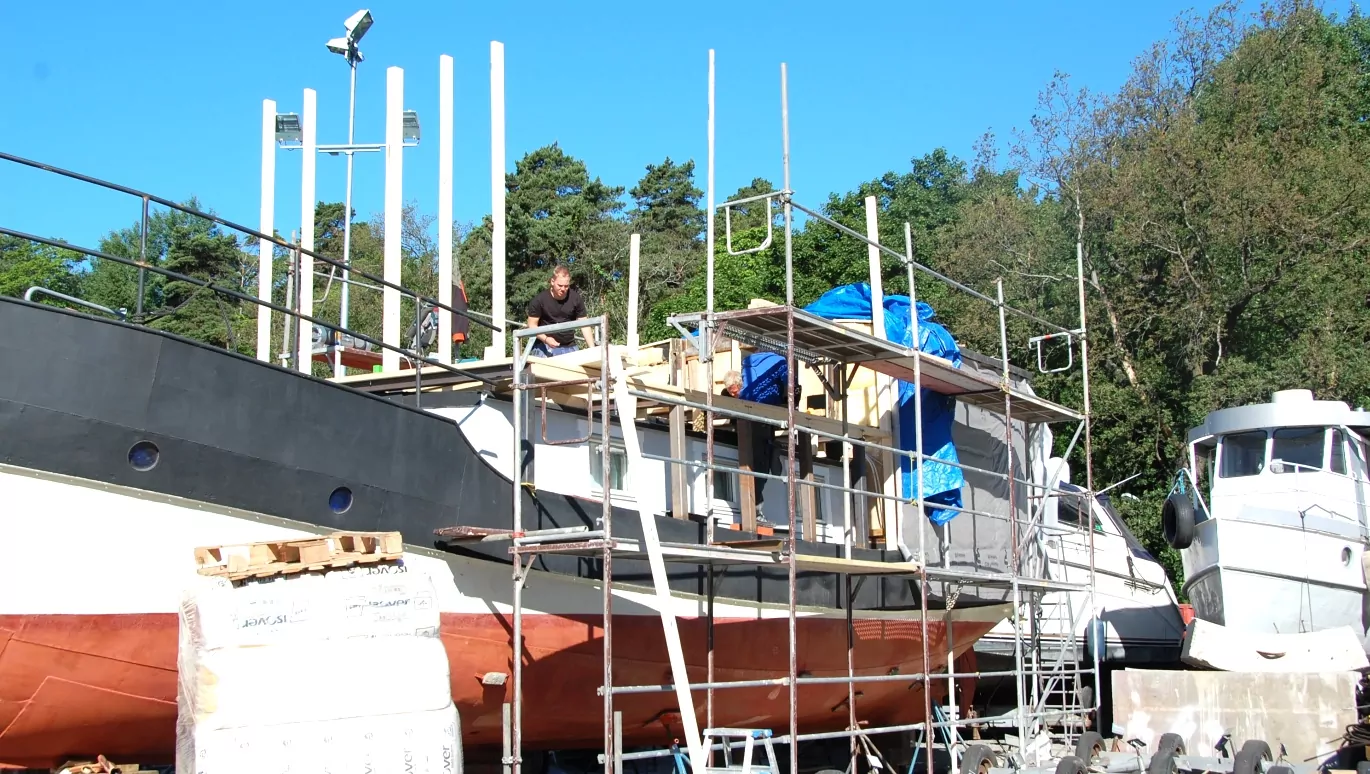
Lifting and demolition
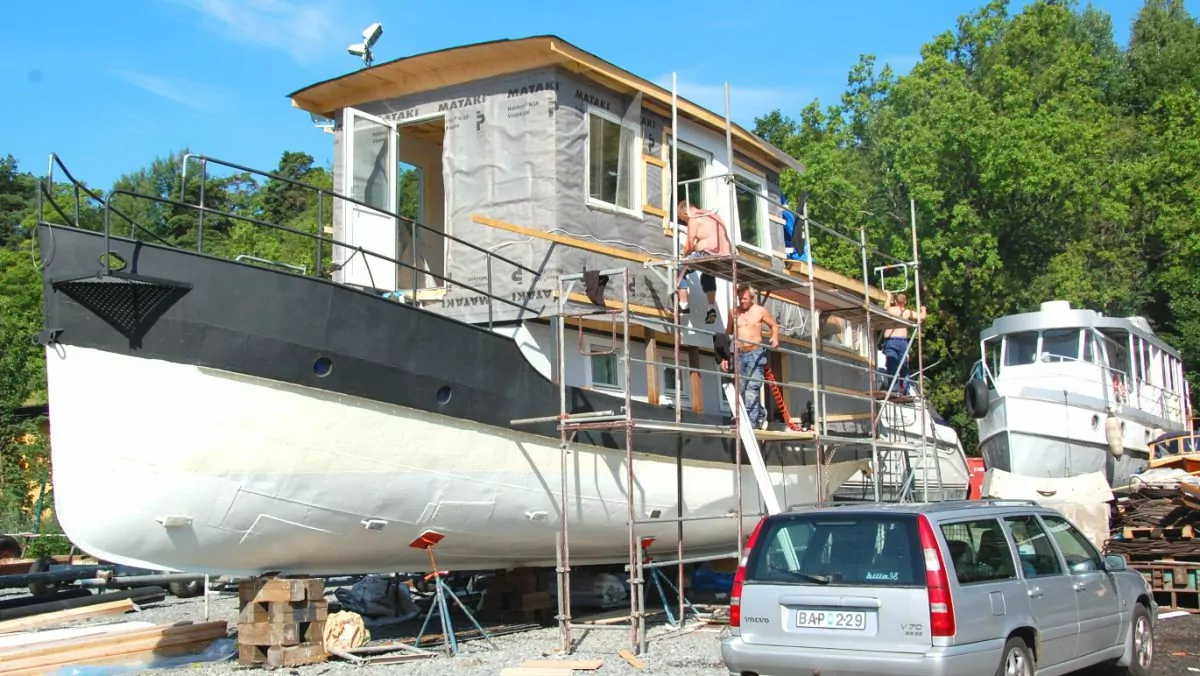
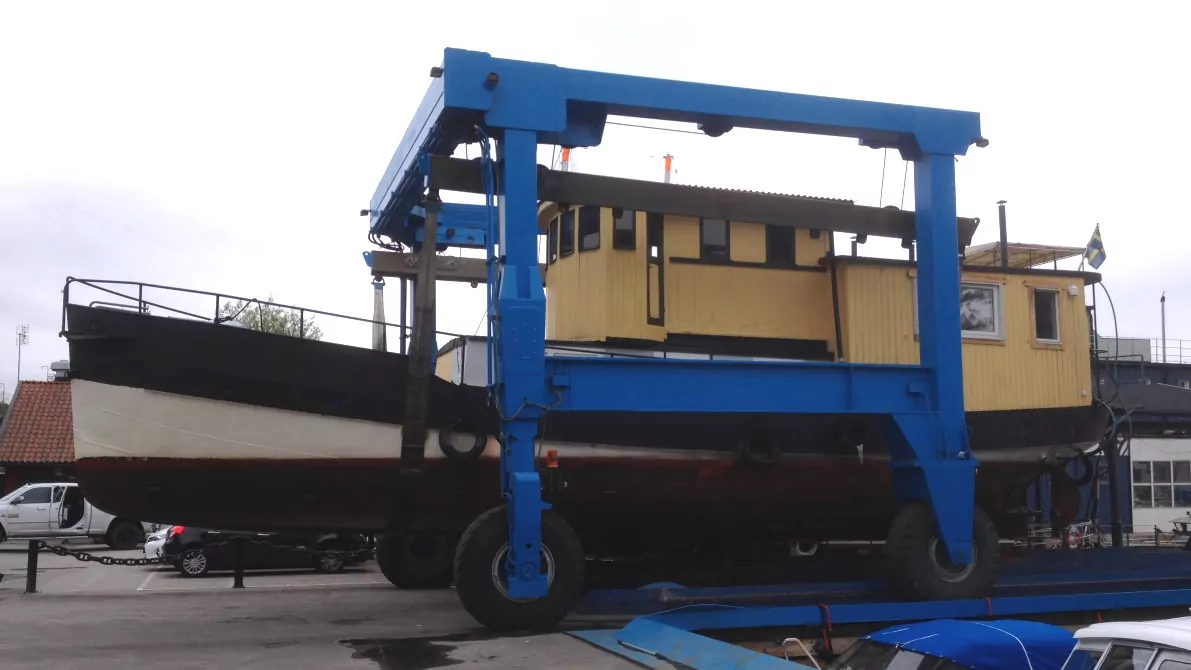
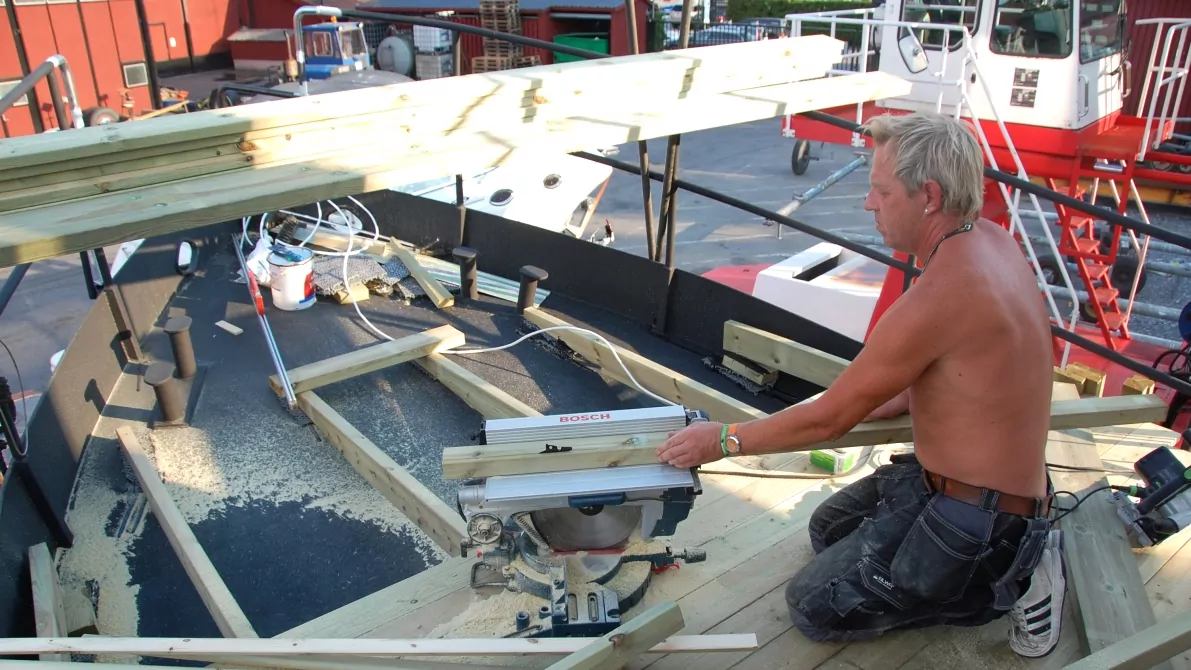
Pampas Marina helped us lift the houseboat onto the shore, and it took a whole day to get it in place on the dock. We ordered scaffolding around the entire boat, and then it was time to start demolishing the upstairs. Now we had ten weeks ahead of us, working 16 hours a day, while living in the campervan...
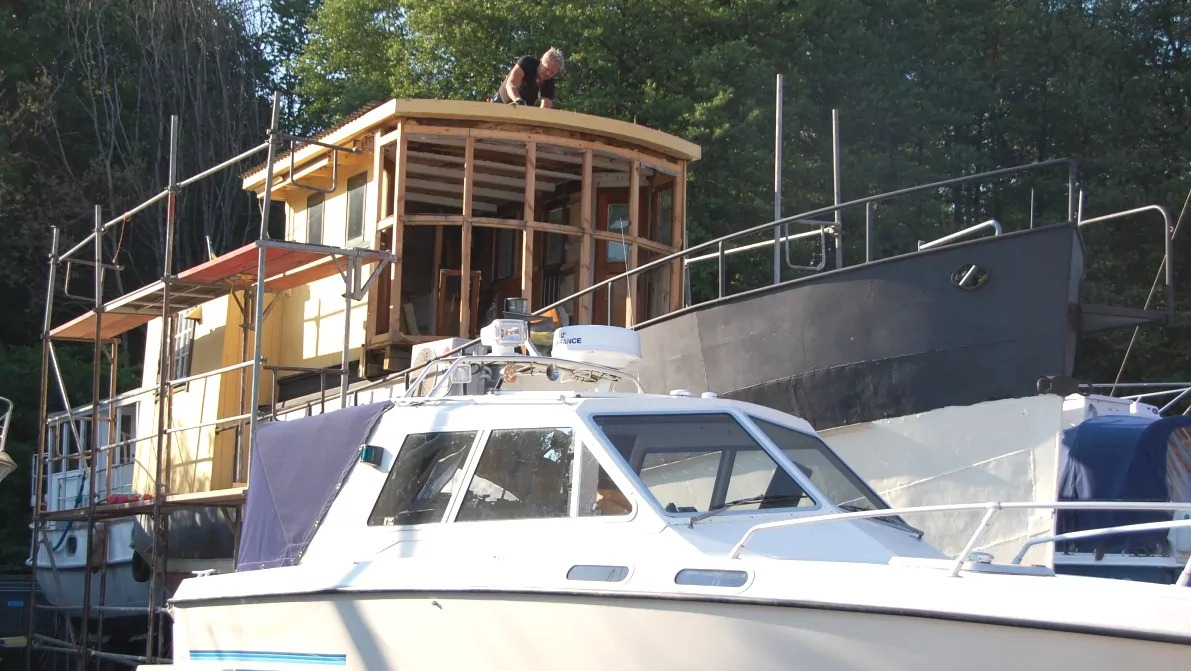
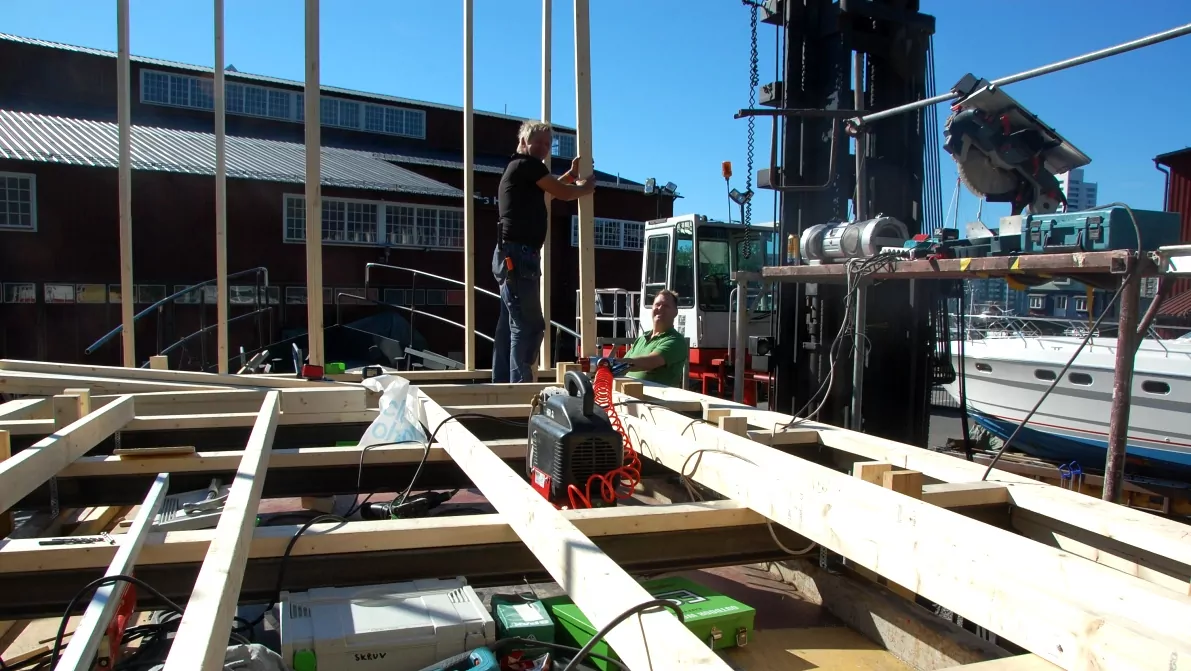
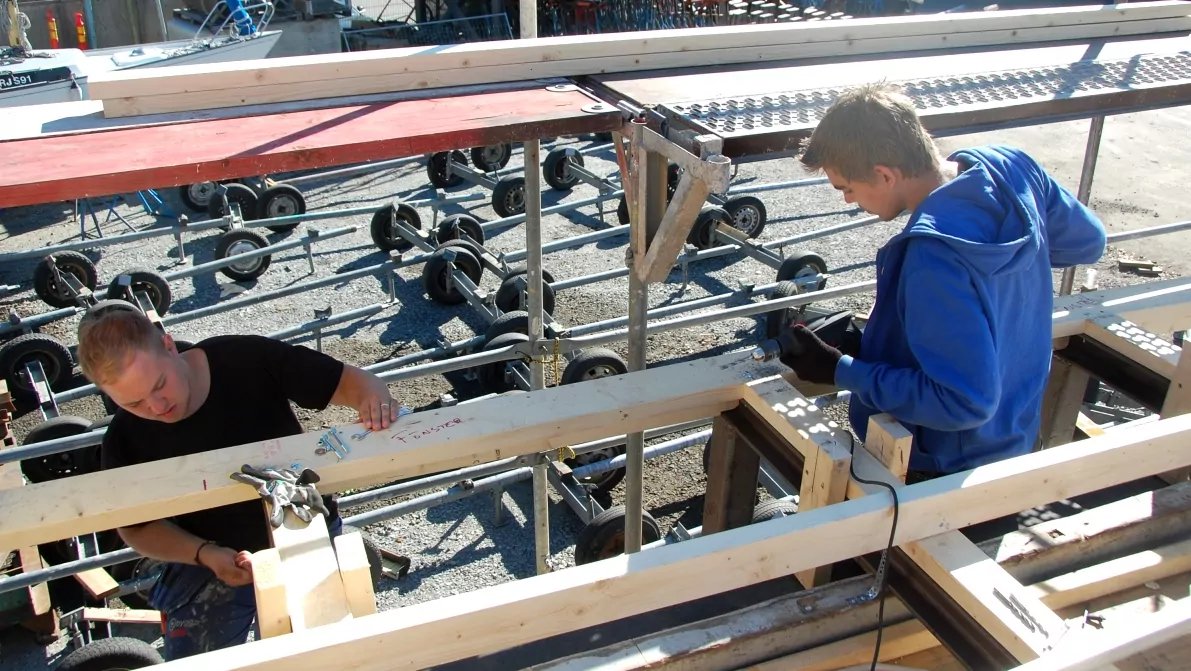
Building a new upper floor
Building a completely new, and much larger, upstairs on the houseboat was more work than we ever imagined. Peter is used to building, but on a boat nothing is straight. And how do you know how the boat will lie in the water when you increase the weight?
We brought in a blacksmith to cast the iron structures, but otherwise we built everything ourselves, with the help of Peter's brother, nephew and two sons. As well as all the actual construction work, there was of course the planning, ordering and collecting of materials and the removal of tonnes of rubbish.
What did I (Helena) do?
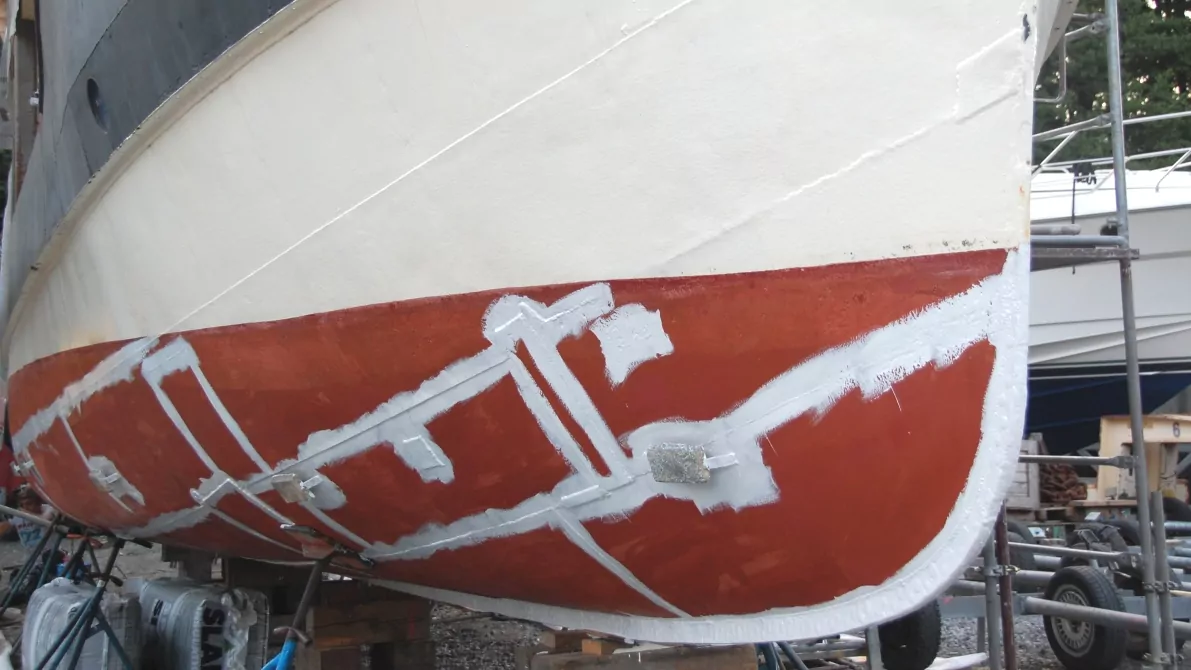
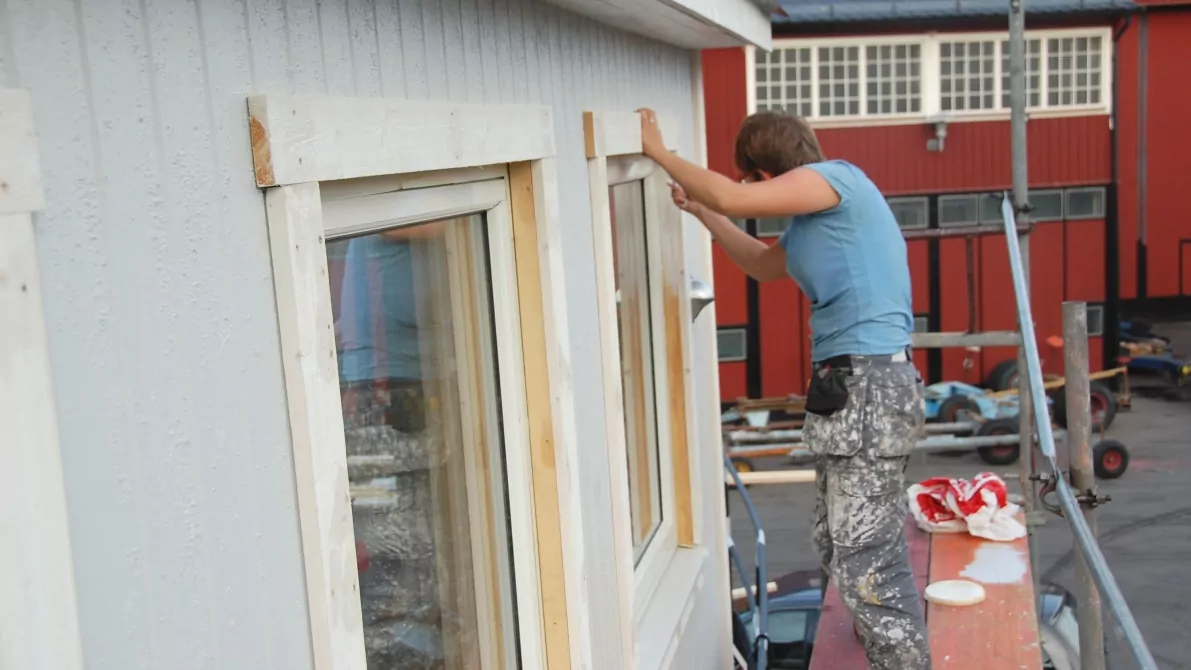
When the guys were building the upper floor, I "enjoyed" sanding and painting the hull. And then you can consider that the boat is 19 metres long and that I not had a machine for the purpose. When this (incredibly!) was done, I painted the boat itself: all new panelling and windows.

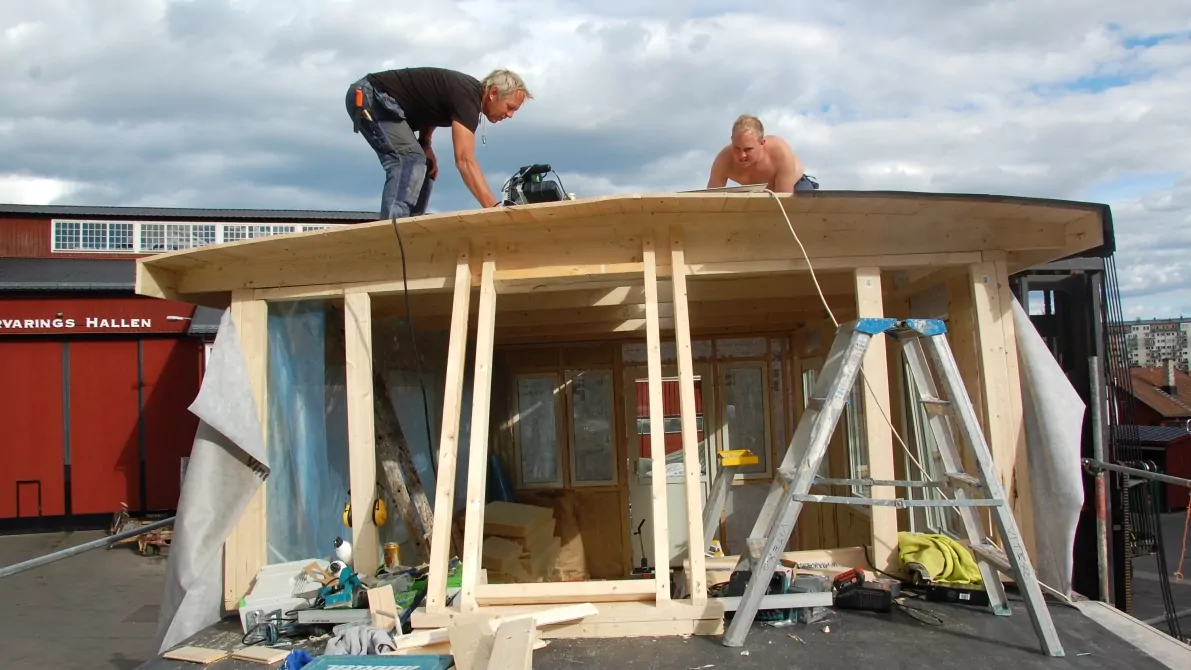
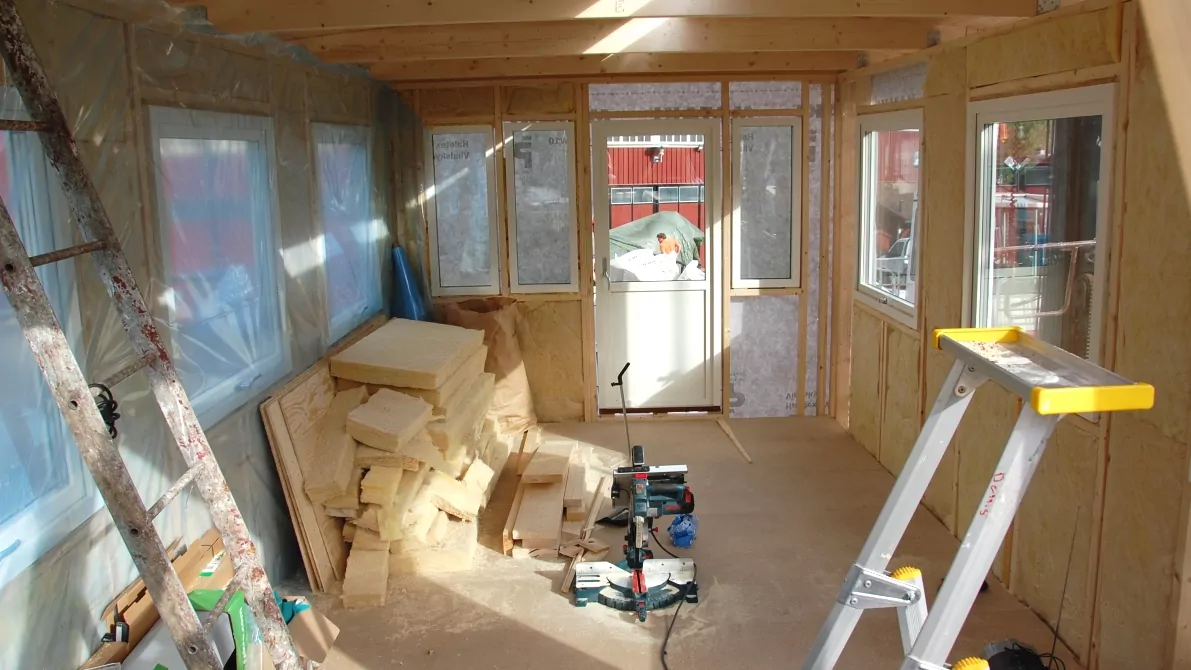
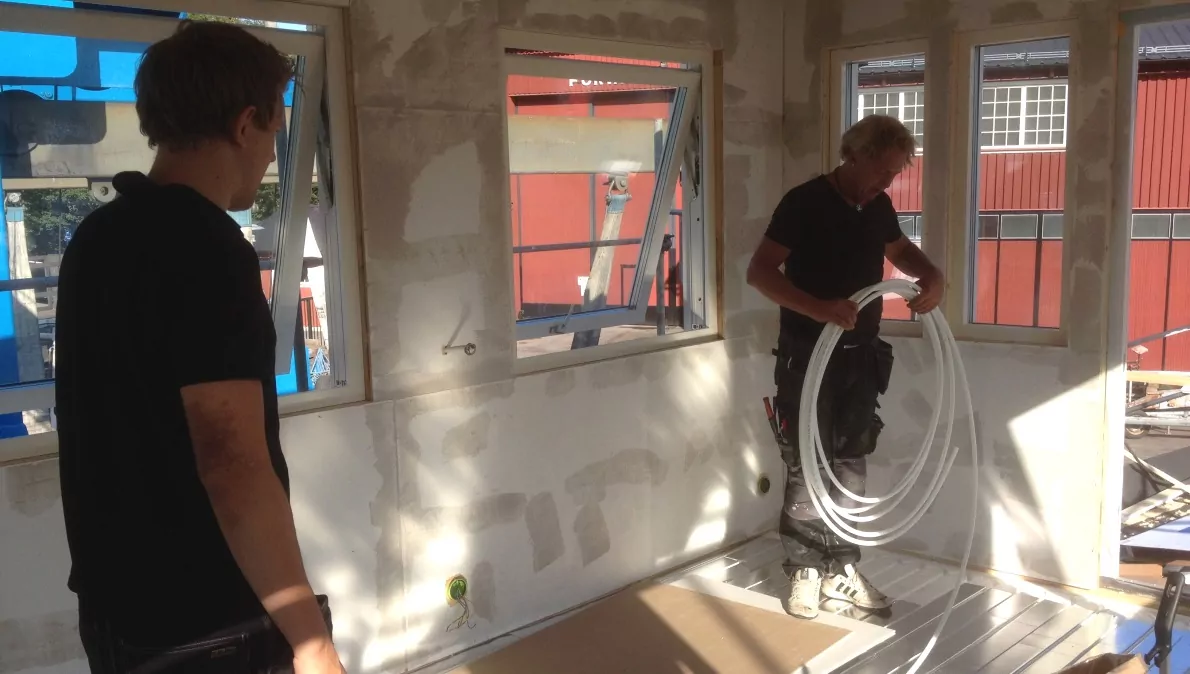
Organising the interior of the room
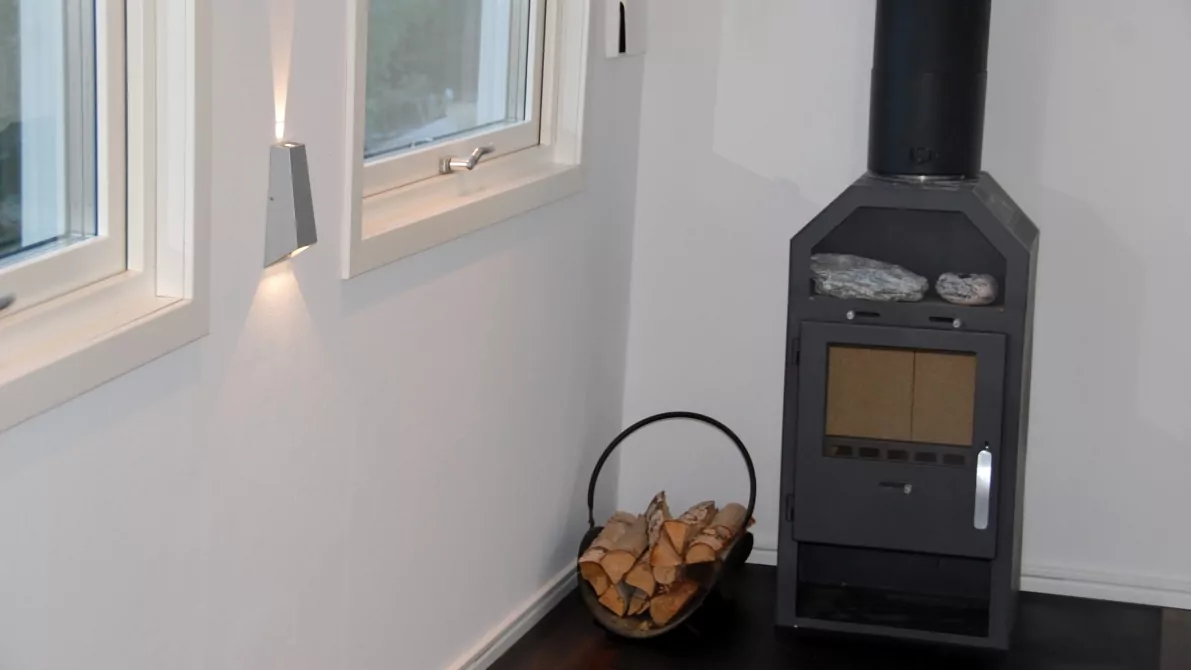
When the new living room was finally in place, it was time to organise the interior of the room. The walls had to be insulated, plastered, levelled and painted. The ceiling also had to be insulated, panelled and painted, and we also installed lighting. Then we put in a heated floor and parquet. Last but not least, it was time for wall lighting, ventilation and a stove.
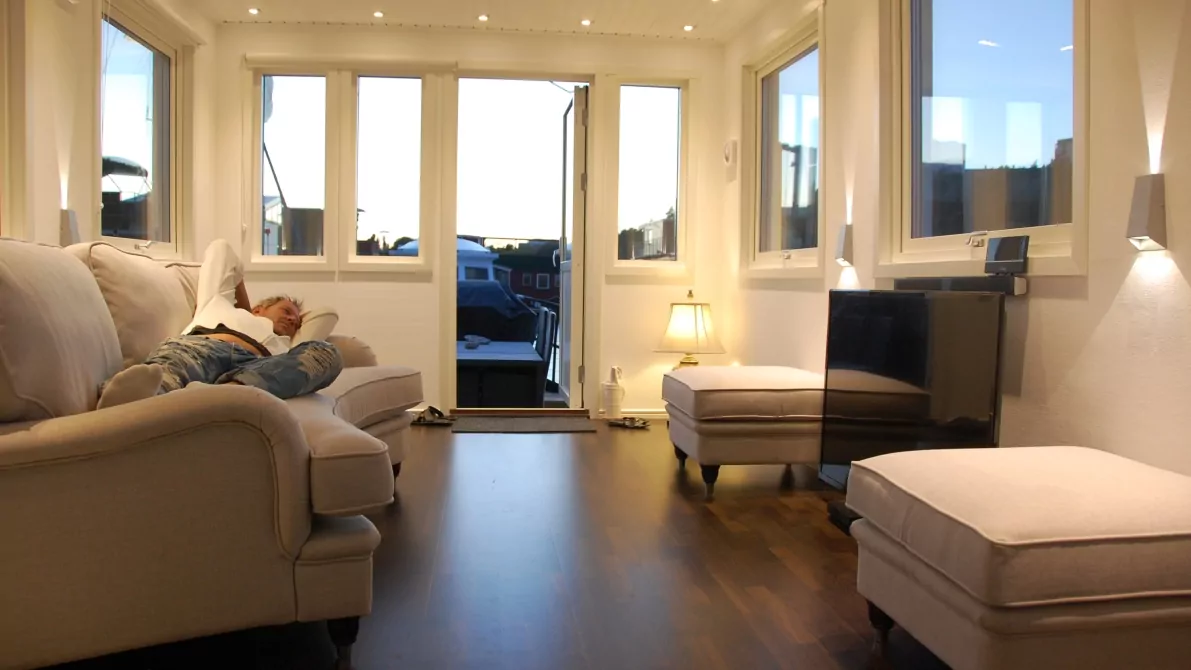
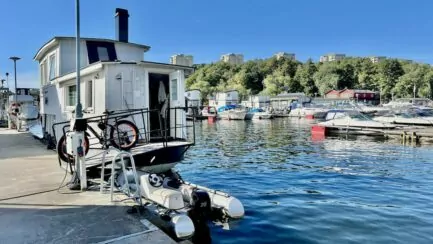
Patio and lighting
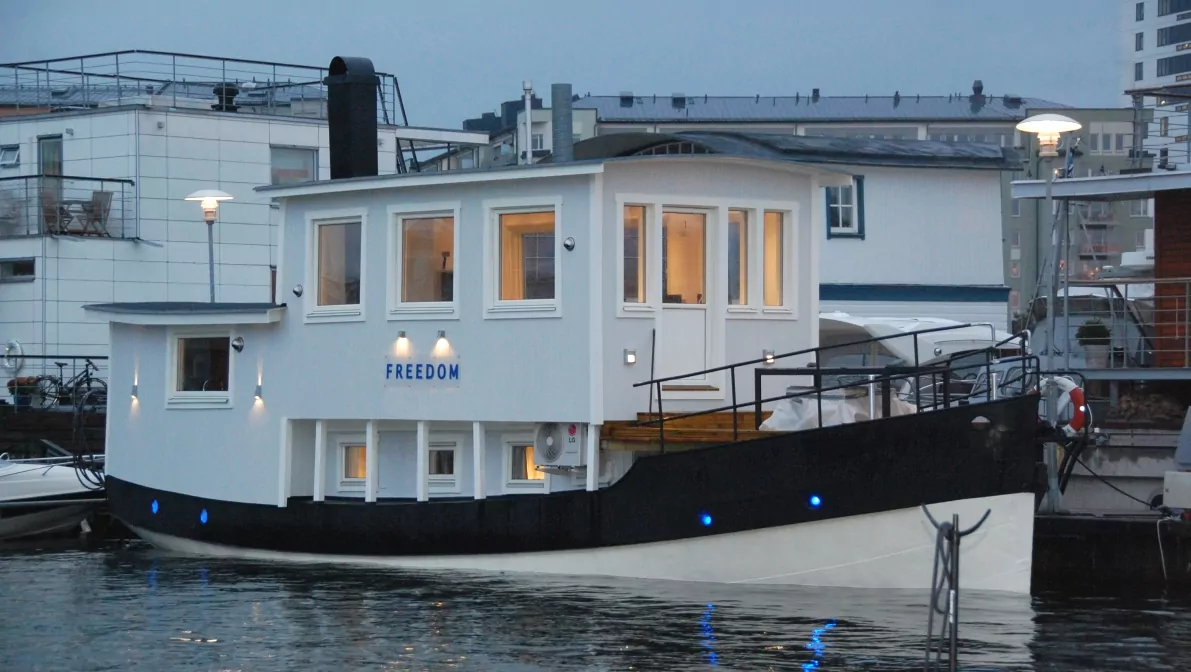
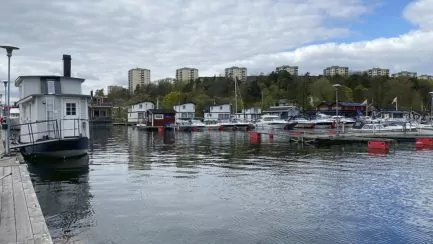
Finally, it was time to build the patio and attach all the exterior lighting. The houseboat is ready! When Pampas Marina put it back in the water, it was 10 tonnes heavier than before and now weighs 32 tonnes.

You might also like:


Lennart says:
You must be happy with the result!
16 August 2016 - 6:57
Thore & Catta says:
Nice work 😉
16 August 2016 - 7:43
Steve says:
It feels like the worst kind of shipbuilding when I look at the pictures. Impressive!
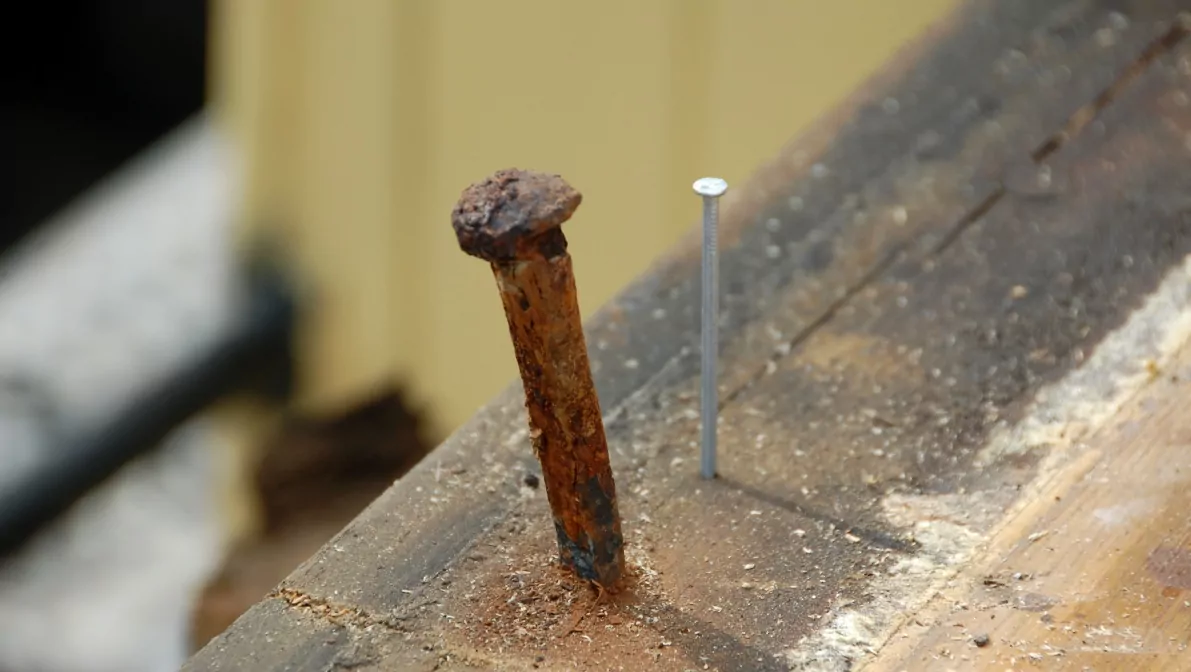
I love the picture of the old hand-forged nail. We have those in the planks of some of the floors in our house. Really big ones.
16 August 2016 - 7:44
Peter Rydh says:
Very hard work but is it really true that the new building weighs 10 tonnes more than the old one? or did you build it out of lead? 🙂
16 August 2016 - 7:57
nils-åke hansson says:
You did a fantastic job
16 August 2016 - 8:07
Ditte says:
What an impressive job you have done! Absolutely incredible!
It is probably impossible to imagine how much is behind it even if you see the pictures.
And how nice the Freedom boat turned out!
16 August 2016 - 8:28
admin says:
Lennart, yes, we are happy!
Thore & Catta, thank you, it was a lot of work... 😉.
Steve, the building looked crazy for a while... And the nail is cool, right?
Peter Rydh, the crane lifting the houseboat weighs it, so it seems so... The old room was much smaller and completely uninsulated with 12 mm walls. The new room is bigger and with much thicker walls (outer panel 22 mm + 20 cm thick framework + inner walls 12 mm). In addition, we have replaced all the small single-glazed windows with 16 large triple-glazed windows. And then new iron structures (1.5 tonnes), thicker insulated roof, new thick floor structure, two new external doors (instead of one internal door), etc... So yes, it seems so 😉.
Nils-Åke, thank you, it was a lot of work... 😉.
Ditte, that's probably true. It's impossible to describe all the steps...
16 August 2016 - 8:30
Aila says:
But what you have worked but it turned out nicely. Very beautiful boat...
16 August 2016 - 8:44
Ama de casa says:
Gosh, what a job! But it turned out well, so it must have been worth all the hard work - at least in retrospect 😉.
But why on earth didn't you use a machine to sand the boat? Self-tormentor, right? 😉
16 August 2016 - 9:18
Anonymous says:
So much work, but it turned out great!
16 August 2016 - 9:54
Geddfish says:
I have to use the word "horse job" again 😀.
Admiration. That you did not succumb but with incredible patience carried out the project, an honour 😀.
The result is so beautiful! 😀
Sunny hug, now I'm going out on the balcony again, haha.....
16 August 2016 - 10:07
Marina says:
It was absolutely fantastic! Such a cosy home!
16 August 2016 - 10:19
Lisa & livet från den ljusa sidan says:
Wow! You guys are awesome!
16 August 2016 - 10:32
Eva says:
Absolutely wonderful!!! a luxury to live like that I think 🙂 thank you for a nice post and nice day 🙂 .
16 August 2016 - 10:50
åsa i åsele says:
Impressed. Crazy amount of work. You should really have a pat on the back for a job well done 🙂 You are incredible to have done this almost by yourself, together with amateurs.
Thank you for answering my questions 🙂
Also, Helena, thank you for your understanding with my whining, hugs.
16 August 2016 - 11:15
Rolle o Carina says:
What a job, you have been sooooo good!
Enjoy the sun......
16 August 2016 - 11:18
steel city anna says:
It turned out great after all the work!
I love real old nails 🙂 we have some in our old outhouse from the mid-1800s. I usually stand and philosophise a bit by them 🙂 .
16 August 2016 - 12:23
Eva - People in the Street says:
Impressive! The result of your hard work was absolutely fantastic. I understand that you are satisfied 🙂
The nail was super delicious!
16 August 2016 - 13:21
admin says:
Aila, thank you! Yes, it was a crazy amount of work ...
Ama de casa, haha, you might ask? I don't really remember. Maybe we had none, or I thought it was difficult or something...?
Anonymous, thank you! No, there wasn't much free time 😉.
Geddfish, "horse job" fits quite well here. And yes, we did almost always fail, several times 😉.
Marina, yes, now it's very cosy 🙂.
Lisa, in retrospect you don't really understand how you survived... but in the end you had no choice but to finish 😉.
Eva, living here now is a luxury, absolutely!
Åsa in Åsele, it was a crazy job! Peter and his brother are carpenters so they are not really amateurs, but this was still completely new to them, and the rest of us mostly helped as best we could 😉.
Rolle and Carina, thank you! It was perhaps lucky that we didn't really understand what we were getting into 😉.
Steel City Anna, I've saved one of those nails as a memento and will put it up somewhere 😉.
Eva, yes, in the end it turned out well! Even if we doubted a few times during the construction... 😉.
16 August 2016 - 13:30
Annika says:
Helena, damn, you are awesome!!!
What a job!
AND such a nice result. How lucky you were able to stay in the motorhome in the meantime.
Yes, hats off, I say.
Coming soon to your neighbourhood. Will definitely walk in the Pampas, will definitely trot out to Freedom. Maybe you will be there? that would be fun.
Terrible with the flare in the head, ugh!!!
16 August 2016 - 14:44
Ämma says:
So, WOW! What a boat, what work you have done. Fantastic!
16 August 2016 - 14:45
Veiken says:
10 tonnes of extra material! Oh my goodness. As much colour as you (Helena) poured on, it is perhaps not so strange! 🙂 🙂
IMPAD, indeed!
16 August 2016 - 17:03
admin says:
Annika, what nice words! Thank you!!! It would be great fun if you came by!!! If we are home, you are of course very welcome! Just knock on the door and see if we are home. If you want to be a little more sure, you can contact me first. I'll write to you on your blog.
Ämma, thank you for your kind words! Yes, it was a lot of work! And now we are happy 🙂
Veiken, haha, yes it must have been the colour! 😉 Agree that ten tonnes sounds a lot, but it seems like it was....
16 August 2016 - 20:27
Matts Torebring says:
It's crazy what a job you've done. A municipal authority would have said, scrap it, there is nothing to be done. Real contractors do everything. When you've worked as hard as you have, you probably appreciate it more when it's finished.
16 August 2016 - 21:38
Ann-Charlotte says:
I am as impressed as everyone above. What a fantastic home you have now! But wasn't it terribly nervous to launch her again ... given the increased weight and higher superstructure. Nice that it went well in any case 🙂.
16 August 2016 - 22:06
BP says:
It is absolutely incredible what you have achieved with the boat! It is like a brand new houseboat. Oh soooo nice it turned out. I remember the pet bottle and the hospital visit. You could call the gaffe a workplace accident, right;-)
16 August 2016 - 22:30
Freja says:
Ohh, what a dream home you have created! I'd love to live on a houseboat, but where I live the boat can't be left in all winter, and then a lot of the charm disappears, to say the least. Not nearly as much fun to live on a stored boat ...
16 August 2016 - 23:11
Susjos says:
Impressive!!!! Agree with all the other posts, what a great job you have done!!!! And how nice it turned out!!!!
16 August 2016 - 23:18
admin says:
Matts, haha it's probably true! Several times we wondered if we were in over our heads, but it went well in the end!
Ann-Charlotte, it was extremely nervous! I didn't even manage to watch, but was at work... 😉 I was a little worried about the stability too, before storms and so on, so we brought in a company and did a stability test. It was approved 🙂
BP, yes it was a kind of workplace accident, and I can see why you have to wear a helmet on real construction sites!!!!
Freja, no you don't want to lie on land 😉 We can also get 20 minus type (if that's what you were thinking of?) but the marina has propellers that move the water around, so it doesn't freeze.
Susjos, thank you! Yes, it was a hysterical amount of work ...
17 August 2016 - 6:13
Ninnie says:
How nice it turned out! I think it was great fun to see how you renovated the boat, you have really done a fantastic job!
17 August 2016 - 7:07
Mia says:
Absolutely wonderful, what a lovely home you have "created" ... is so impressed AND sotis =) We are renovating an old croft ourselves (we are now in the 5:e year) so I really understand all the work that is behind every picture you show ... always looks so much "easier" when you just see the pictures =/ On Hemnet there is now a houseboat for sale in Kalmar and we are soooo hungry (comes from Kalmar but has lived in Gothenburg for the last 21 years now) and I started searching for other houseboats and then got info about Pampas Marina ... so funny that you now found my blog which made me find yours ... about your nice houseboat ... a wonderful coincidence =) Hugs to you Mia
17 August 2016 - 10:54
admin says:
Ninnie, thank you! I'm glad you enjoyed the post!
Mia, thank you for your comment! How well you describe it, yes, there is probably more work behind each picture than you can explain! And what a fun coincidence that you looked at a houseboat! Feel free to contact you if you want tips on what to consider! 😉
17 August 2016 - 17:03
Lena - gott för själen says:
I mean, how much work?!?!! Impressive effort. And how nice it turned out. You can't believe it's the same boat.
Hug Lena
17 August 2016 - 20:06
Znogge says:
What a huge project and how much work you put into it. But it also turned out very well!
17 August 2016 - 22:00
admin says:
Lena, yes, a crazy amount of work! And in a way, it's almost a new boat now 😉.
Znogge, yes it was an insane amount of work! But now it is a comfortable and good accommodation 🙂 .
18 August 2016 - 8:18
Sandra Emilia says:
OJ so lovely!!! Nice it turned out 🙂
18 August 2016 - 20:43
Marianne - Glimt av verden says:
A bit of a job, but it turned out so well in the end!
18 August 2016 - 21:58
admin says:
Sandra Emilia, thank you!
Marianne, thank you! Yes, after much effort it turned out well!
18 August 2016 - 22:05
Inga Magnusson says:
Nice to finish the renovation!. Or will there be more??? Can the boat be as heavy as you like? You don't have to ask a building authority for remodelling but can just fix it as you see fit? How luxurious! It's nice anyway. Now you get it good!
21 August 2016 - 22:40
admin says:
Inga Magnusson, we are finished now! In the future, it will only be maintenance and perhaps small fixes. And no, we are not allowed to build just anything. Our boat is part of the city planning, so we had to apply for planning permission.
21 August 2016 - 23:36