
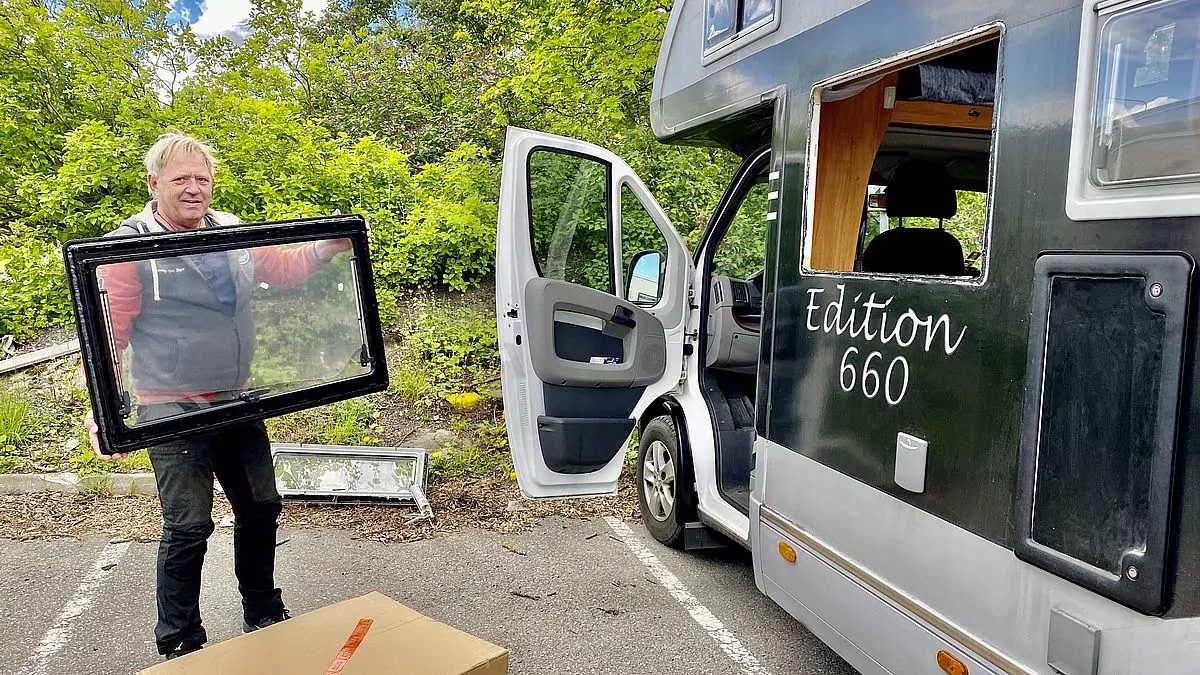

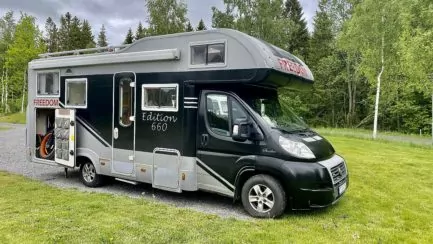
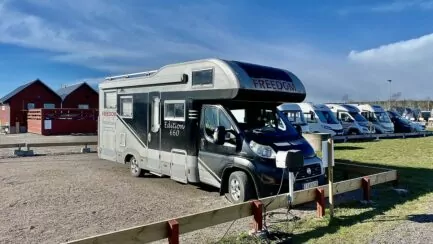
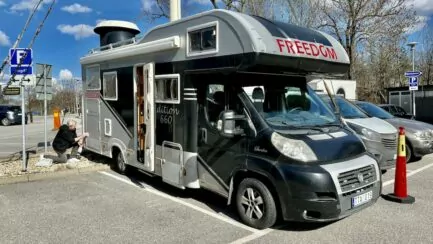
It was time to replace the hatches and windows on our FREEDOM motorhome! We had several hatches that were broken and worn and a window with a temporary repair. We made a move and replaced four hatches and one window.
 Tweet
Tweet Share
Share Share
Share Pin
Pin Share
Share Share
ShareInnehållsförteckning
Time to change the hatches and windows on your campervan
We have been thinking for a long time about replacing worn-out doors and windows on the motorhome. The whole motorhome is a bit worn on the outside. We have also talked about replacing the foil, but it is both expensive and a lot of work, so we hesitate. If nothing else, it will be a bit better now that we're replacing the hatches and windows. Peter bought the doors and window online from CampOut.
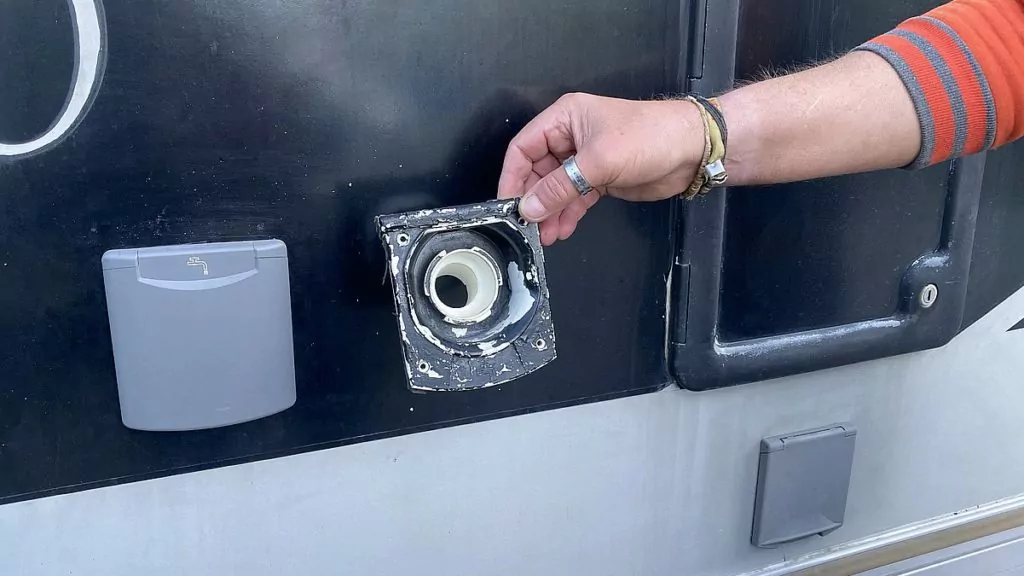
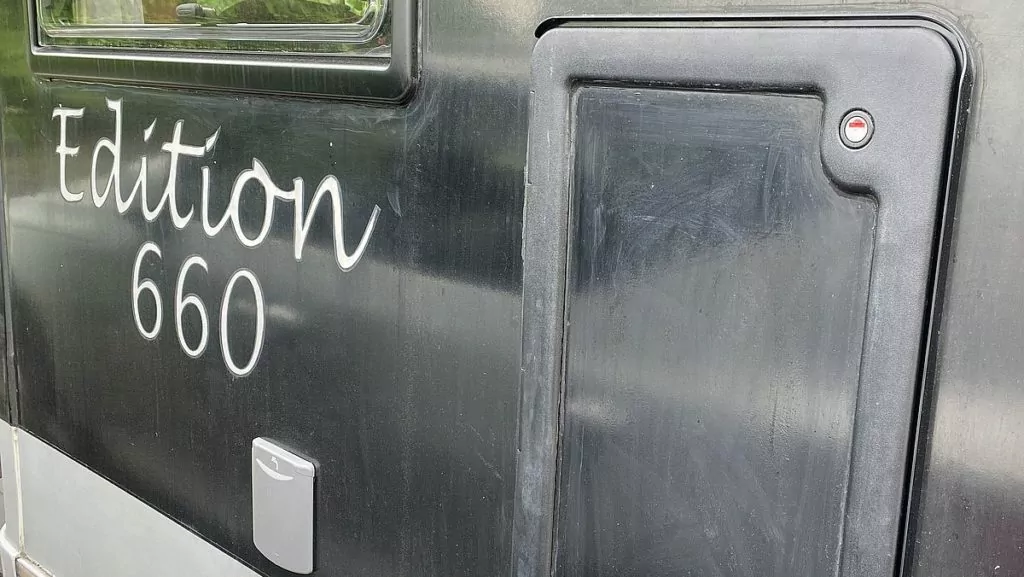
Hatch for water filling
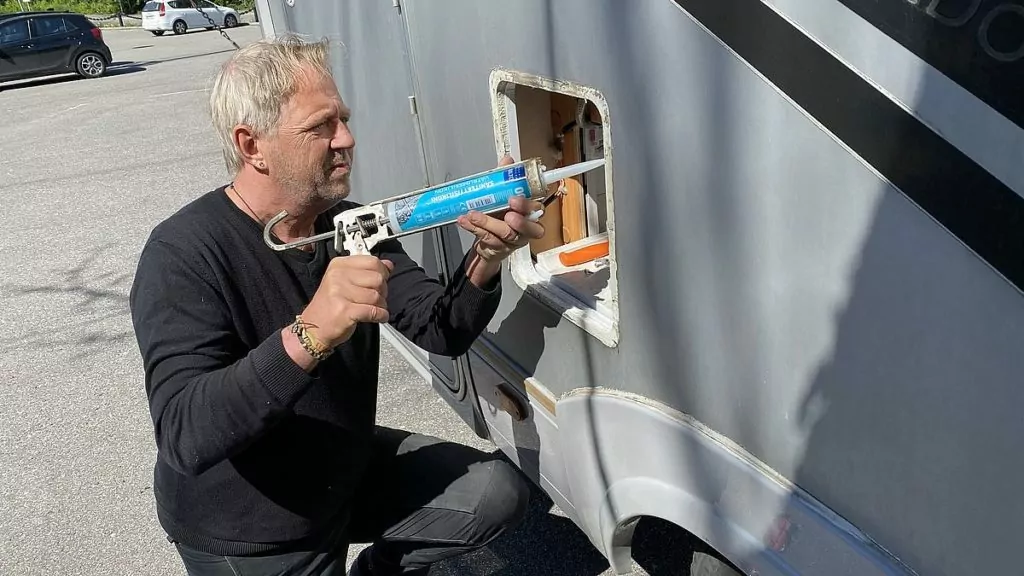
Our water filling hatch looked awful. The lid wouldn't close and was banging against the wall as we drove. Eventually Peter got so annoyed that he pulled it off. We painted the hatch underneath black at some point, but it got very worn after a while ...
Peter ordered a new grey hatch and fitted it with screws and silicone. However, the screws included in the package didn't work because the threads just went around, so he had to buy bigger screws.
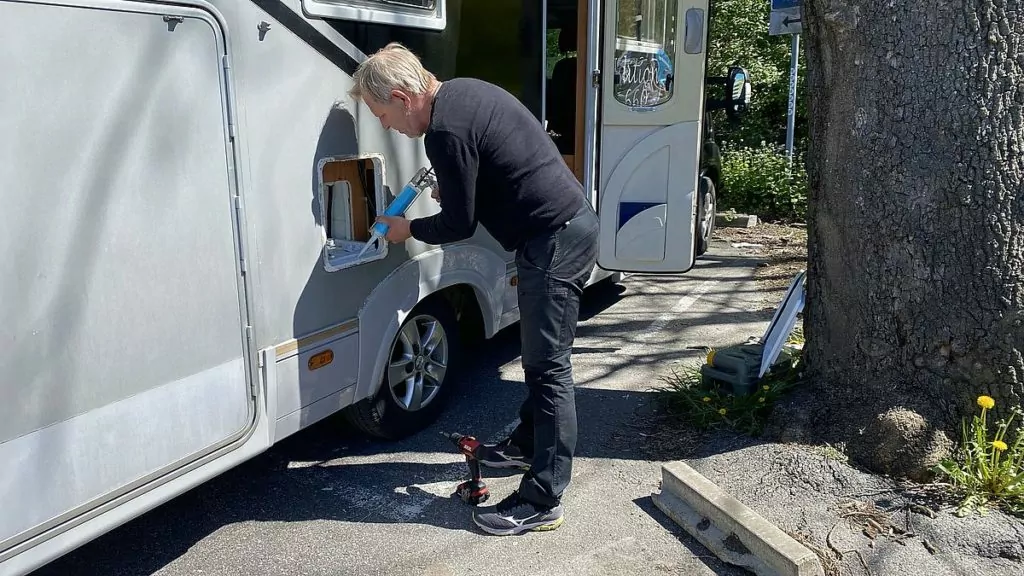
Update: Several people have commented that there is a better sealant than silicone for motorhomes. This is particularly important when it comes to the windows, which need to be able to move towards the car (see below). We used silicone on some of the smaller hatches that are screwed down, because we did it ten years ago and it has worked well for us. But there are other products to choose from, perhaps more suited to motorhomes.
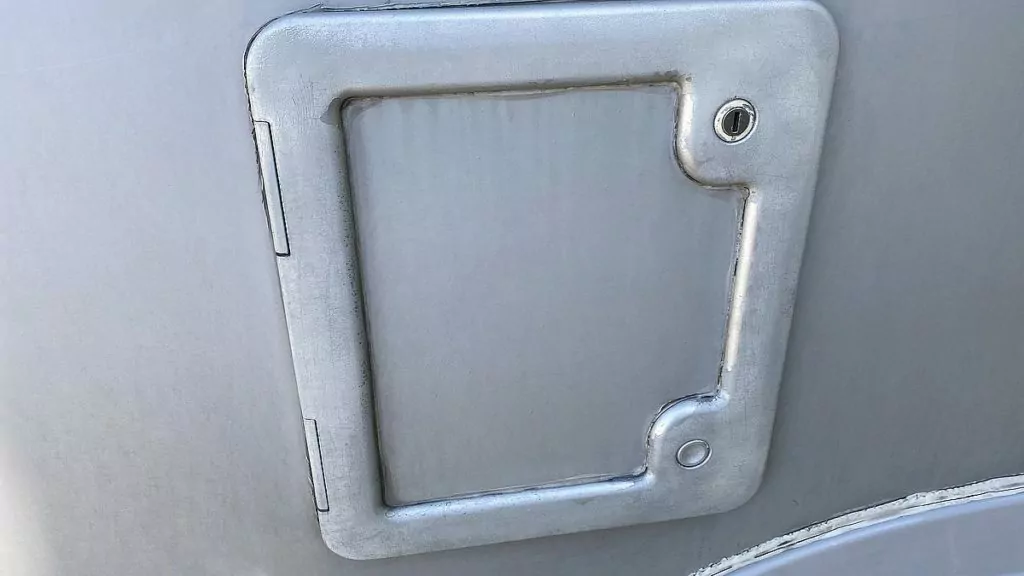
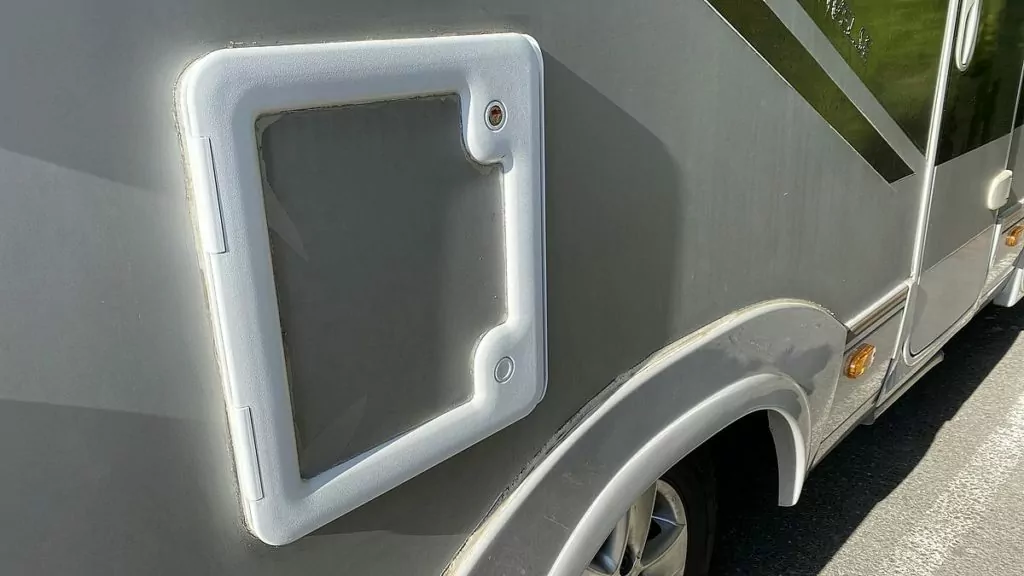
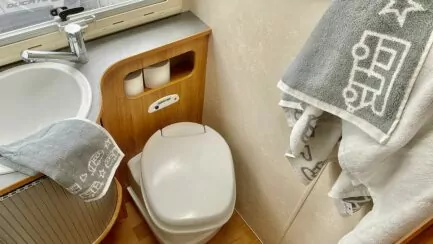
Hatch for toilet tank
Then it was time for the toilet tank hatch. It was simply worn and ugly, so Peter fitted a new one. Here it was the same thing. There were screws in the package, but he had to buy bigger screws. The new door is very light (so light grey that it almost looks white), but at least it's new and fresh.
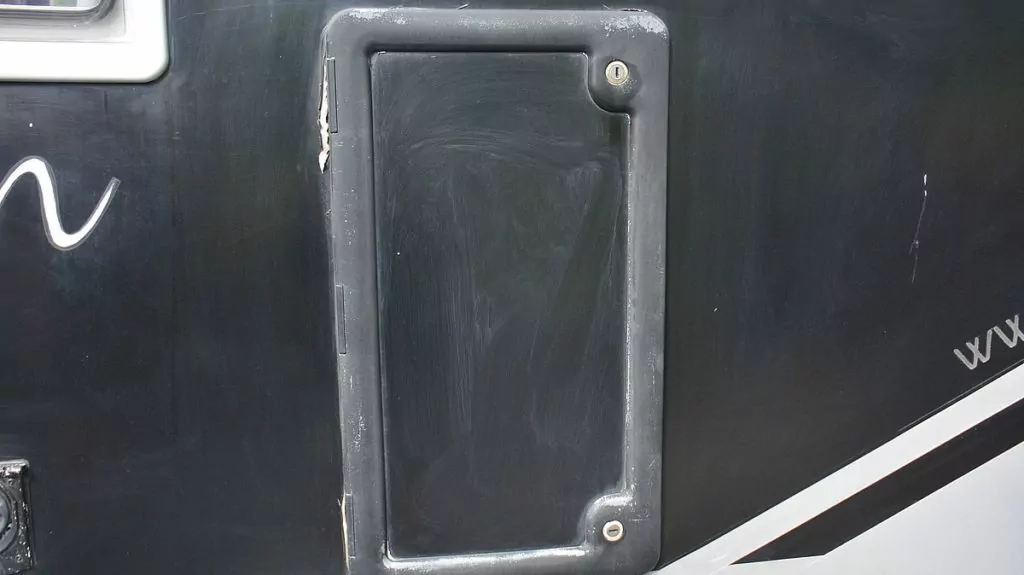
Hatch for rubbish removal
The hatch at the rubbish collection point, behind the kitchen, was also very worn. Here it was exactly the same as with the other doors. That is, Peter had to buy larger screws, and also used silicone.

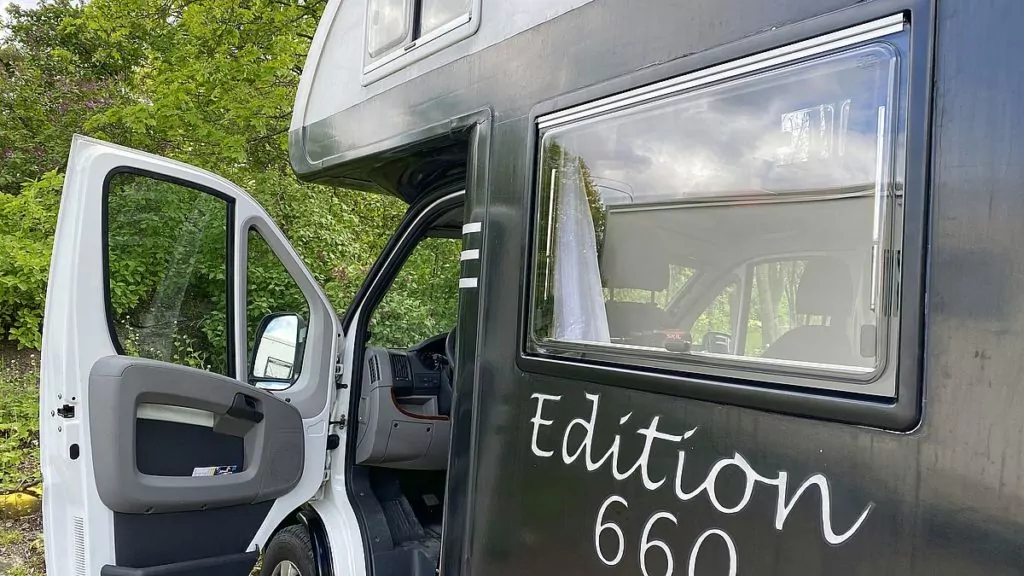
Replacing windows on a motorhome
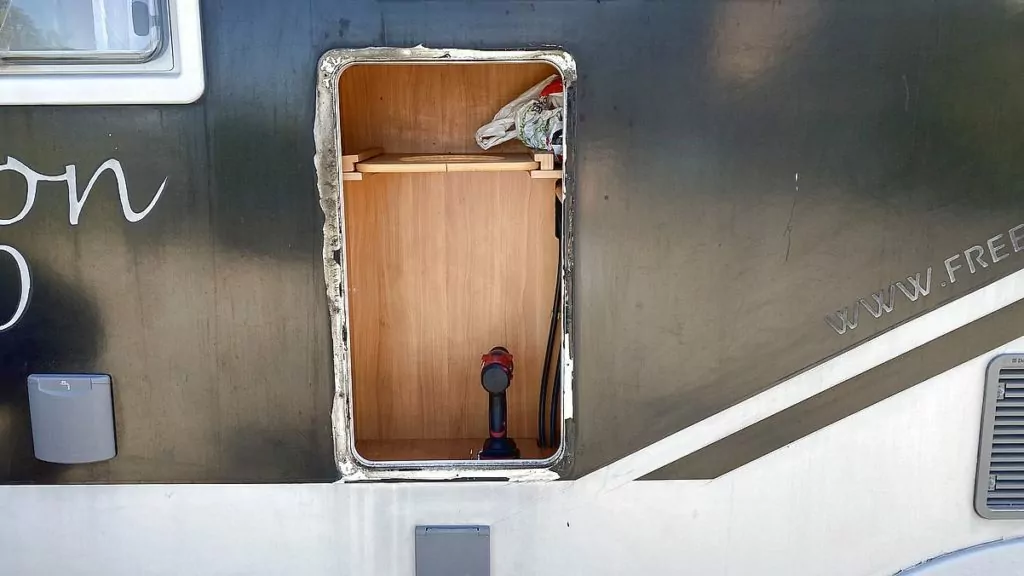
Finally, it was time to replace one of our windows on the motorhome, and we were a bit nervous about this. The window broke on a campsite in Sardinia 2015, when the campsite owner asked us to back up one metre and we (with the window open) backed right into a lamppost. We repaired it with super glue and tape and it has lasted all these years, but not so funny perhaps ...
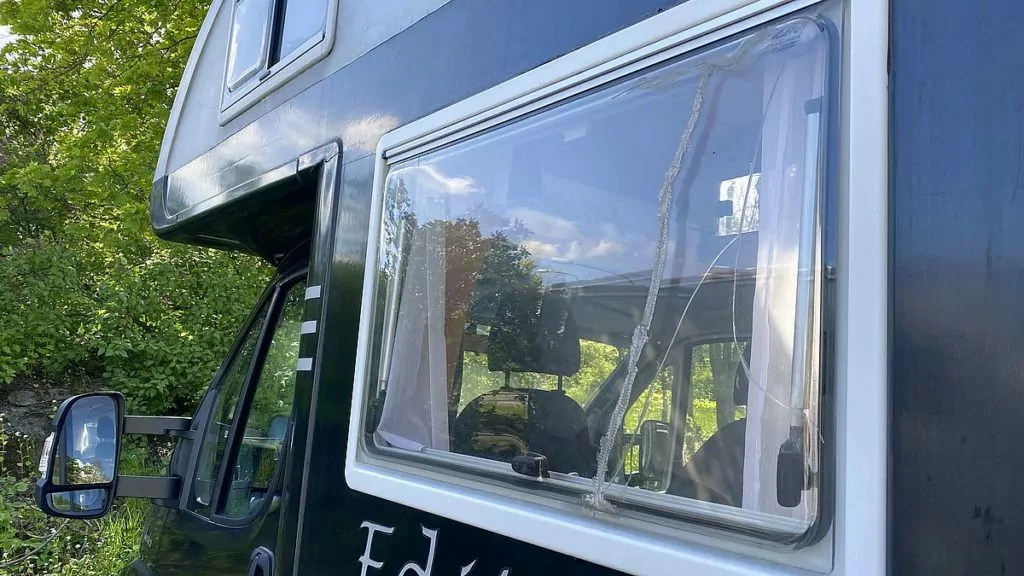
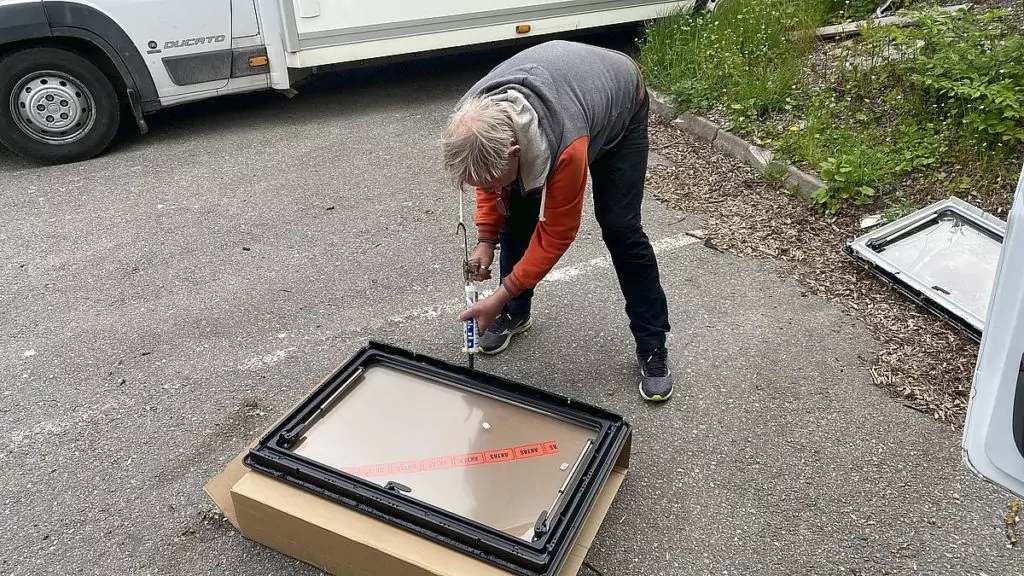
Now it was time to finally do something about it! We removed the old window and applied a thick coat of sealant (plastic, which doesn't dry). We pushed the window into place and screwed it down with the screws that came with it. It is important to apply even pressure, i.e. all screws should be equally tight. Finally, we put the little hats on over the screws, and we were done!

It's really nice to have new hatches and windows in place. We fix one thing after another, and the motorhome feels more and more homely at the same time.
If you have a motorhome or caravan, have you ever changed the windows or hatches?

You might also like:
 Smart solutions in your motorhome - 11 practical tips
 Motorhome washing in Stockholm - where and how?
 Burglary in the motorhome - one broken window
 How we solved the problem of grey water in the camper van
 Motorhome/caravan bathroom - tips and upcoming products
 Spring cleaning your motorhome - preparing for your spring trip


Nils-Åke Hansson says:
The age resistance of the plastic is below all criticism. It's good that you can do it yourself, it would have cost a lot for the company.
30 May 2020 - 9:25
Helena says:
We certainly save a bit by doing it ourselves!
30 May 2020 - 20:00
Hasse says:
The hardest job is to remove all the old grout, so that it is properly sealed afterwards.
Nice!
30 May 2020 - 10:02
Helena says:
Yes, that's part of the job!
30 May 2020 - 20:01
Ama de casa says:
Well done! 🙂
You nailed this post perfectly - I saw somewhere that today is "Window Renovation Day". (There really are days for everything... 😉 ).
30 May 2020 - 10:10
Helena says:
Are you kidding!!!? A few days ago, we published a post about a national park (our first ever) and it happened to coincide with National Parks Day.
30 May 2020 - 20:03
Henny says:
Fortunately, Peter is a handy man. Tough to take on such an extensive renovation, but it will be nice and fresh. Good luck with the rest of the refurbishment and we keep our fingers crossed that we can move around longer than we can in two hours... We all hope for a nice camping summer.
30 May 2020 - 10:13
Helena says:
We hope to be able to move a bit longer. But if we have to stay within 2 hours, we'll make the best of it!
30 May 2020 - 20:04
Eva says:
PS: I don't know where you use plastic and silicone, but years in various camping groups have taught me not to use common construction products. Butyl is the word that pops into my head. ❤️
30 May 2020 - 10:20
Emma, Sol som sol? says:
So! Now I can comment again! 😀
What a lot of changing of hatches. How many are there really on a motorhome! It was interesting that there was a special one for rubbish, thought it was otherwise a bucket under the sink. Think how little you know about this world when you are not inside it.
As the others have commented, how fortunate that you can do so much yourself anyway. Suspect there is a lot of money floating away on all those gaps.
30 May 2020 - 11:33
Lasse says:
New hatches are always an improvement. Replaced a roof hatch a year or so ago, it went as smoothly as possible once you find out what sealant to use and how to remove the old one. I want to remember that I used...
30 May 2020 - 12:00
Bengt says:
Our water and electricity and diesel hatches were also completely rubbish. Fluttered when driving etc. Fitted super magnets to the hatch and washers to the frame and painted these. Lasted for three years before they started to rust. Then just redo with better glue and paint. Simple and cheap
30 May 2020 - 14:39
Rolle o Carina says:
Surely it will look good again with new doors and windows!
Fortunately, you can do most of it yourself.
Our car is only 3 years old so it should last a while longer!
Car greetings in fine weather??☀️☀️
30 May 2020 - 18:15
Solan says:
No box deduction, so you have to be clever and take matters into your own hands.
Have a great time on future trips! ??
30 May 2020 - 19:16
BP says:
I completely agree with Emma! There are so many gaps in a motorhome. A heavenly luck that Peter is so handy and knows his thing, knows what and how to do. So now Freedom is ready for holiday:-)
30 May 2020 - 20:41
Krister P says:
Installed extra window next to the door because it is missing in the door measured for several hours until I dared to put the drill and saw up was absolutely fantastic. Box with sliding window because the door can break the opening. Buy Camping 4 you.
31 May 2020 - 18:14
Åsa says:
What a mess! Am full of admiration??
01 June 2020 - 18:30
Lena - gott för själen says:
Yes, I understand that it felt good. Always wonderful to get new and fresh.
Hug Lena
03 June 2020 - 5:39
Cezary Marzec says:
What kind of screw did you use?
09 April 2022 - 9:56
Helena says:
The windows are screwed between the outer and inner frame, i.e. the frames are screwed together. These screws come with the windows when you buy them. Then we sealed with a non-drying sealant.
11 April 2022 - 17:37